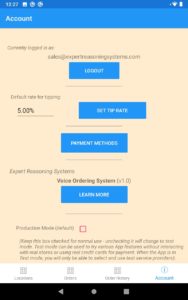
(If you have downloaded the app but have not yet signed up, please first visit APP INSTALLATION).
This page describes how to make a basic order. (The basic order described here is a “Flexi Order”; see below for a description of the difference between a flexible order and a contingent order).
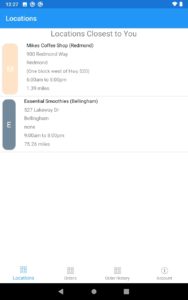
1) When you first open the app, the Locations page is shown: it shows the shops that are available, showing the closest shops first:
2) Once you choose a Location, you are taken to the Order page for that shop and greeted by the chatbot. For example, if you have selected “Mikes Coffee Shop (Redmond)”, the chatbot will speak “welcome to Mike’s Coffee Shop”, or another greeting such as “what can I get started for you?”. Here is a screen shot showing the page background where the user has responded with “give me a coffee”.

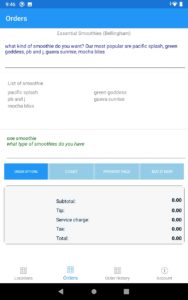
3) The chatbot will ask as many questions as needed to clarify what you as the customer want as part of this order. The chatbot can respond to questions like “what type of X do you have”. Here is an example for smoothies:
4) When you have finished making your order, the Order page will provide you with an itemization of the order, and a breakdown of pending charges that involves a subtotal, a tip (if any), a service charge, sales tax, and the order total. The chatbot will speak the total amount to you. This screenshot shows an example:
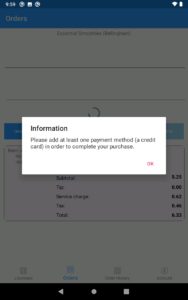
5) As can be seen, the Payment Page button and the Buy It Now button are both enabled. If this is your very first order, you may choose either button – the App will guide you through the process of entering your payment method (i.e. a credit card). Alternately, at the “Speak Now” prompt, you can say “payment page”, or “buy it now”. Here are several screenshots showing what happens next (the user has spoken “buy it now”).

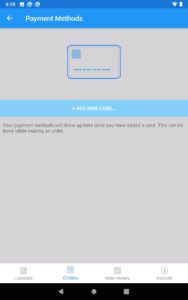
6) On the Payment Methods page, select “Add New Card”. For testing, this card info can be used:
Card # 4242 4242 4242 4242 Expires: 06/24/ CVC: 123 Zip: 98222
(Note: when you are finished entering the card, make sure to press the check box in the upper right-hand corner of the page, before navigating back to the previous page).
7) When you return to the Checkout page, the card you had entered will be selected and the Place The Order button at the bottom of the page will be enabled. Press Place the Order to make the purchase.

8) If the charge is successful, a message box will be displayed, as shown below. Likewise, if processing of the charge fails for any reason, you will be shown a message to indicate that the payment attempt failed.

9) You can check on the status of your order on the Order History page, as shown here:

10) This tutorial has covered the topic of making a basic order. A basic order is also referred to as a “flexi order” and is by default an unscheduled order – the assumption is that the order will be ready for pickup within approximately 10 to 20 minutes. Variations on the basic order are as follows:
- Contingent Orders: a contingent order is an order that gets sent to the shop for approval or rejection. The shop will normally fill all order requests, but the shop will handle a contingent order by first checking to make sure all ingredients are available for each order item. If any ingredients are missing, the shop may call the customer to check if substitutions can be made. Subsequently the shop will either approve or cancel the order request. In contrast, when you as a customer make a “Flex Order”, you are providing prior approval for the shop to make any reasonable substitutions, as might be necessary. A contingent order can be specified by going to the Order Options page (from the Orders page) and un-checking the “Flexi Order” check box.
- Scheduled Orders: you can use the Order Options page to schedule an order for a designated time later in the same day. The shop will typically wait until shortly before that time to actually fill the order so that it is ready for you to pick up at the designated time. If the scheduled order is also a “Flexi Order”, you will be charged at the time when you make the order. If the scheduled order is a Contingent Order you will not be charged until the shop approves the order.


